Installing a WordPress theme is the moment your website's personality comes to life. Whether you're launching your first blog, redesigning a business site, or building an online store, the theme you choose — and how you install it — shapes everything from speed to user experience.
In this comprehensive guide, you'll learn five proven methods to install a WordPress theme, from beginner-friendly dashboard clicks to advanced WP-CLI commands. Each method is broken down step by step, with real-world tips to avoid common pitfalls.
Why Your WordPress Theme Matters More Than You Think
A theme isn't just a coat of paint. It is the structural skeleton of your entire WordPress website. It controls the layout, the typography, the color palette, the header and footer design, the responsiveness on mobile devices, and even some SEO behaviors like schema markup and page load speed.
According to data from WordPress.org's official theme directory, there are now over 11,000 themes available — free and premium — spanning every niche imaginable. The challenge isn't finding a theme; it's finding the right one and installing it correctly.
A poorly chosen theme can slow your site, break your SEO, or create a confusing experience for visitors. A great theme, by contrast, establishes trust, reduces bounce rates, and makes your content shine.
In 2026, Block Themes (built for Full Site Editing) are increasingly dominating WordPress design. If you're building a new site from scratch, seriously consider a block theme for maximum design flexibility using the Gutenberg editor.
Critical Steps Before You Install Any WordPress Theme
Rushing to install a theme without preparation is one of the most common mistakes WordPress beginners make. Take five minutes to do these things first — they can save you hours of headaches.
- ✓Back up your entire site. Use a plugin like UpdraftPlus or your host's built-in backup tool. If anything goes wrong during the switch, you'll have a restore point.
- ✓Test on a staging site first. A staging environment is a private copy of your live site. Most quality hosts provide this feature. Never test a new theme directly on your live site if visitors depend on it.
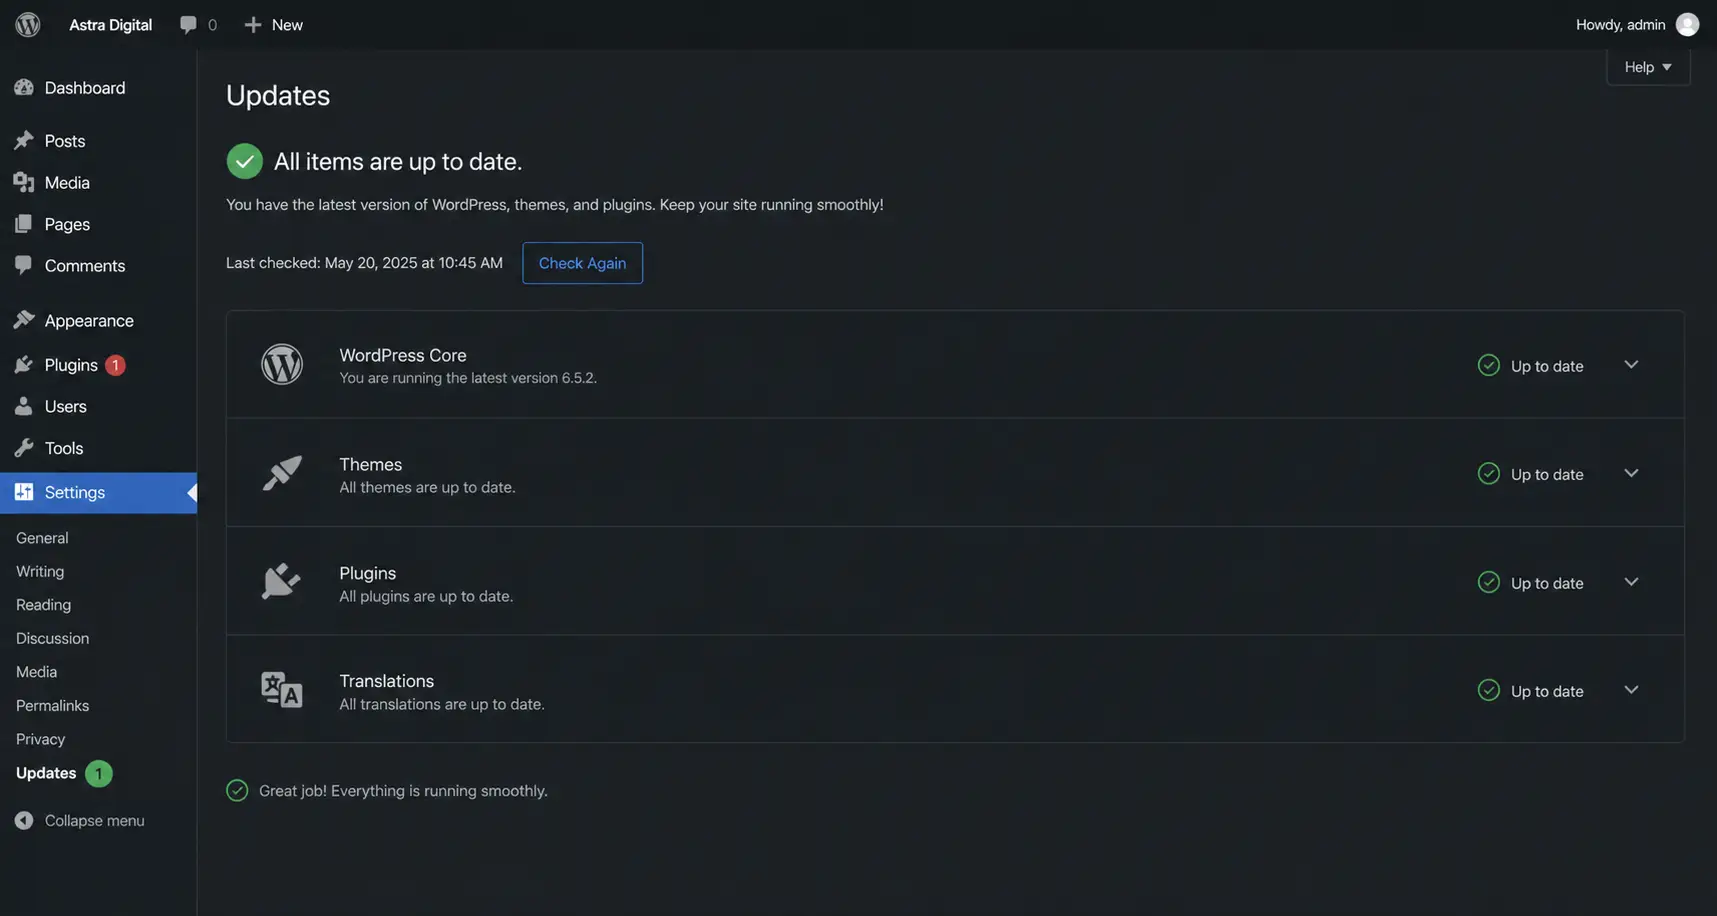
- ✓Update WordPress core and all plugins. Theme conflicts often happen because WordPress or a plugin is outdated. Get everything current before switching.
- ✓Note your current customizations. Save any custom CSS, tracking codes (Google Analytics, Meta Pixel), and widget settings. These do not carry over automatically when you switch themes.
- ✓Check the theme's compatibility. Make sure the theme supports your current WordPress version and is compatible with the page builder or plugins you rely on (e.g., Elementor, WooCommerce).
1Install a WordPress Theme via the Dashboard
This is the go-to method for most WordPress users, and for good reason: it requires zero technical knowledge and takes under two minutes. The only limitation is that it works exclusively with themes listed in the official WordPress.org theme directory.
Step-by-Step: Install WordPress Theme from the Dashboard
Go to yourdomain.com/wp-admin and log in with your credentials.
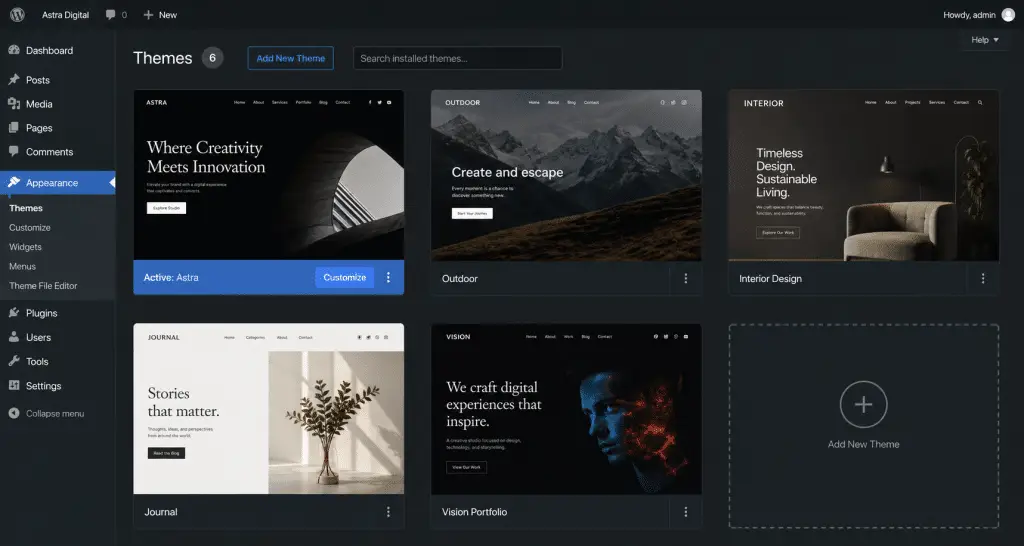
In the left sidebar, hover over "Appearance" and click "Themes" in the flyout menu.
You'll see a button at the top of the Themes screen. Click it to open the theme directory browser.
Use the search bar if you know the theme name. Or use the "Feature Filter" to narrow by layout, subject, or features like Full Site Editing support.
Hover over any theme thumbnail to reveal a "Preview" button (see a live demo) or click "Install" to add it to your site immediately.
Once installed, the button changes to "Activate." Click it — your site now uses the new theme.
Before activating on a live site, use the "Live Preview" option. It loads your actual site content inside the new theme so you can spot layout or compatibility issues without publicly switching.
2Upload a WordPress Theme via ZIP File
Purchased a premium theme from ThemeForest, StudioPress, or an independent developer? Or downloaded a free theme from a source outside WordPress.org? This ZIP upload method is your path forward.
Premium themes almost always come packaged as a .zip file. This is the standard archive format WordPress uses, and the dashboard has a built-in uploader just for this.
Step-by-Step: Install WordPress Theme from a ZIP File
From ThemeForest or your theme provider's dashboard, download the installable theme file. Note: some marketplaces bundle multiple files — make sure you grab the installable WordPress theme ZIP, not the entire package.
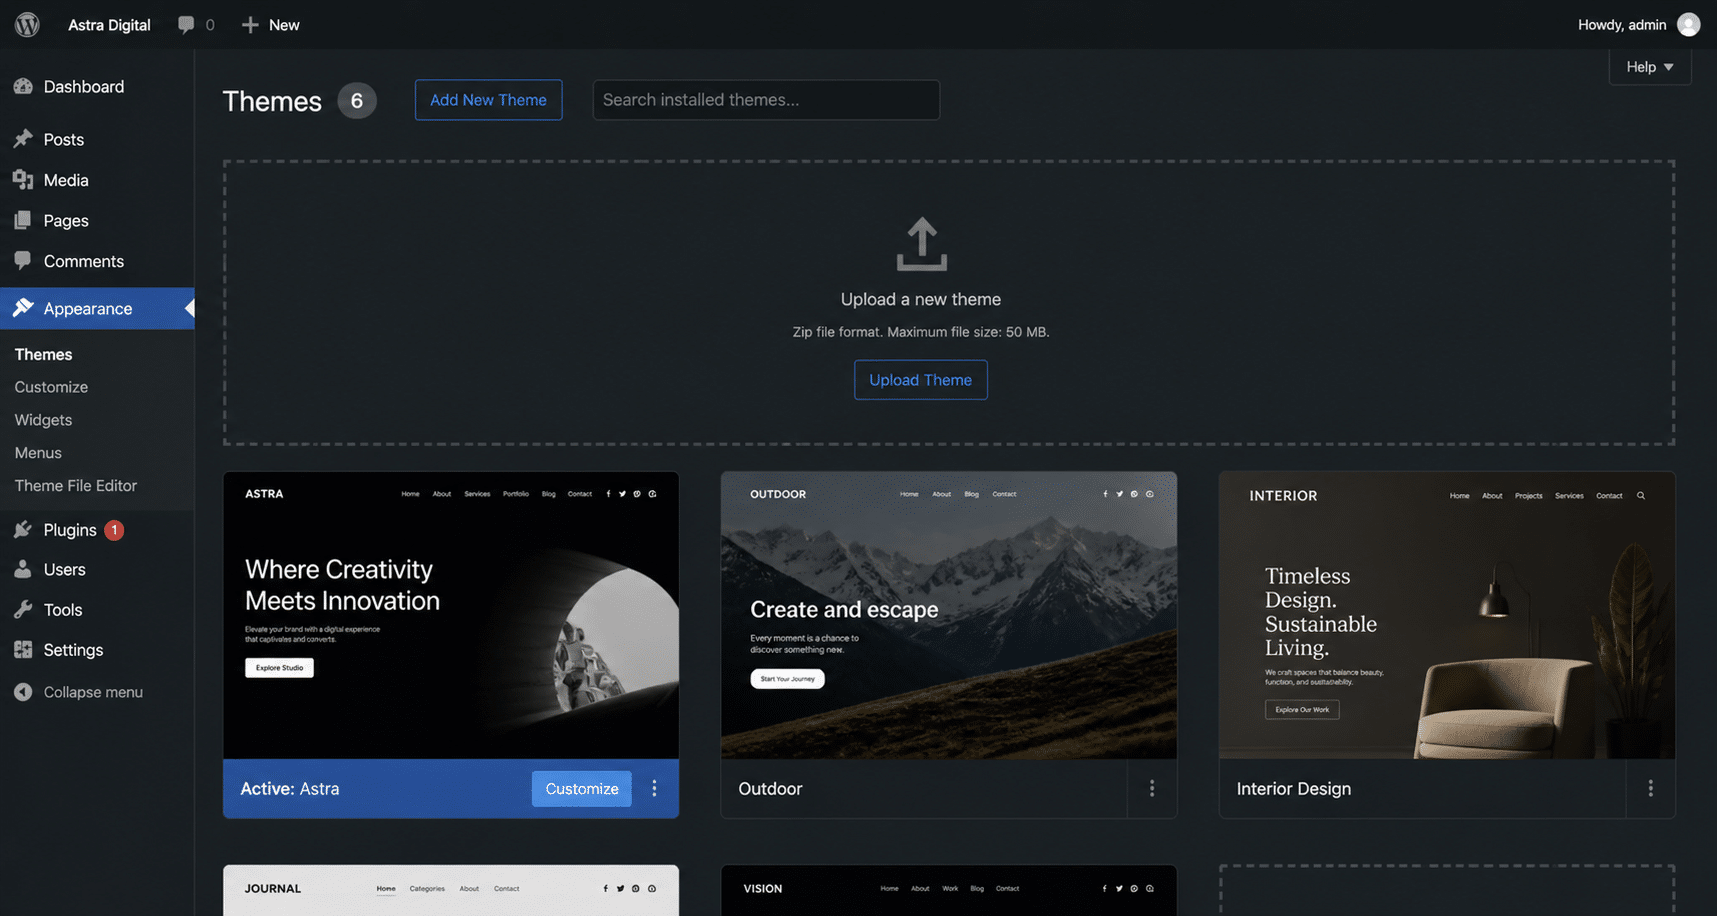
Same navigation as Method 1, but now look for the "Upload Theme" button near the top of the page.
A file picker dialog appears. Navigate to your downloaded ZIP file and select it.
WordPress will upload and extract the theme files. This takes a few seconds depending on file size.
Click "Activate" on the success screen, or find it under Appearance → Themes.
If you see an error like "The uploaded file exceeds the upload_max_filesize directive in php.ini," your server's upload limit is too low for the theme file. In this case, use Method 3 (FTP/File Manager) instead, which bypasses this restriction entirely.
3Install via FTP or File Manager
The FTP method bypasses the WordPress dashboard entirely. You're directly placing theme files on your server, which makes it ideal for large themes that exceed upload limits or for situations where the WordPress admin is inaccessible (e.g., after a failed update).
You'll need either an FTP client like FileZilla (free, cross-platform) or your hosting panel's built-in File Manager. Most hosts including cPanel-based ones have this.
Using Your Host's File Manager (Recommended for Beginners)
Find the "File Manager" tool — it's usually prominently displayed in the files section.
public_html/wp-content/themes/
This folder contains all themes currently installed on your site.
Use the Upload button in File Manager to upload the ZIP. Once uploaded, right-click it and choose "Extract."
Go to Appearance → Themes in your admin. The newly uploaded theme will appear — click "Activate."
Using FileZilla FTP Client
You'll need: FTP hostname, username, password, and port (usually 21 for FTP, 22 for SFTP). Always prefer SFTP for security.
Enter credentials in the Quickconnect bar at the top and click Quickconnect.
/public_html/wp-content/themes/ on the right panel
This is the remote server side. Your local computer's files appear on the left panel.
Important: Upload the extracted folder, not the ZIP file, when using FTP. The folder should contain files like style.css, functions.php, etc.
Head to Appearance → Themes and click Activate on your new theme.
4Install a WordPress Theme Using WP-CLI
WP-CLI (WordPress Command Line Interface) is the developer's secret weapon. Instead of clicking through a dashboard, you issue simple text commands via SSH — and WordPress obeys instantly. It's fast, scriptable, and uses far fewer server resources than the GUI.
If you manage multiple WordPress sites, you can script theme installations across all of them simultaneously. That's a game-changer for agencies and developers.
Install a Theme from the WordPress Directory via WP-CLI
# Connect to your server via SSH first
# Then navigate to your WordPress root
cd /public_html

# Search for a theme
wp theme search astra

# Install a theme by its slug
wp theme install astra

# Install AND activate in one command
wp theme install astra --activate

# Check which theme is active
wp theme status
Install a Custom/Premium Theme from a ZIP File via WP-CLI
# First upload your ZIP via FTP or File Manager
# Then install directly from the file path
wp theme install /public_html/wp-content/themes/mytheme.zip

# Activate the theme (use the theme's folder slug)
wp theme activate mytheme

# List all installed themes
wp theme list
You can chain WP-CLI commands in a shell script to install the same theme across dozens of sites in seconds. This is especially useful for WordPress multisite networks or agency workflows where you maintain a standard theme stack for clients.
5Install via Hosting Onboarding Flow
Several managed WordPress hosts now integrate theme selection directly into their onboarding flow. When you sign up and launch a new WordPress install, the setup wizard asks you to pick a theme before your site even goes live.
Providers like Hostinger, Bluehost, and SiteGround have built this into their dashboards. You select a theme, click a button, and the host installs and activates it automatically — no manual steps required.
This method is ideal if you're starting fresh. The limitation is obvious: it only works during the initial setup of a new WordPress installation.
How to Choose the Right WordPress Theme in 2026
Before you install anything, you need to choose wisely. With tens of thousands of options available, decision paralysis is real. Here's a practical framework for cutting through the noise.
Block Theme vs. Classic Theme: Which Should You Choose?
This is the most important decision in 2026. WordPress is firmly committed to its Block Editor (Gutenberg) and Full Site Editing (FSE) architecture. Block themes are built natively for FSE, giving you drag-and-drop control over every part of your site — header, footer, templates, and more — without any coding.
Classic themes still work perfectly and remain dominant in the ecosystem, but they rely on older customization methods (Customizer, Widgets, PHP templates). If you're starting fresh and want to future-proof your site, lean toward a block theme.
Key Factors to Evaluate Any Theme
- ✓Performance score. Test any theme candidate using Google PageSpeed Insights. A theme with a demo score below 80 on mobile is a red flag.
- ✓Mobile responsiveness. Over 60% of global web traffic in 2026 is mobile. A non-responsive theme is dead on arrival.
- ✓Plugin compatibility. If you use WooCommerce, a page builder, or an SEO plugin, confirm the theme explicitly supports these.
- ✓Update frequency. Check the changelog. A theme that hasn't been updated in 18+ months is likely abandoned — a security and compatibility risk.
- ✓Support quality. For premium themes, check the support forum or ticket system response times. Good support is worth the price premium.
- ✓Demo content availability. A theme with importable demo content can save you days of setup time.
For deeper advice on theme selection specifically for developers and agencies, see our guide on advanced WordPress theme development at Codethesiss.
Method Comparison: Which Installation Method Is Right for You?
| Method | Skill Level | Works for Premium Themes | Bypasses Upload Limits | Automatable |
|---|---|---|---|---|
| Dashboard (Directory) | Beginner | ✗ Free only | ✗ | ✗ |
| ZIP File Upload | Beginner | ✓ | ✗ | ✗ |
| FTP / File Manager | Intermediate | ✓ | ✓ | ✗ |
| WP-CLI | Advanced | ✓ | ✓ | ✓ |
| Hosting Onboarding | Beginner | Depends on host | ✓ | ✗ |
What to Do After Installing Your WordPress Theme
Activating a theme is just the beginning. Here's what to do immediately after to get your site looking and performing its best.
1. Import Demo Content (If Available)
Most premium themes include a one-click demo importer. This populates your site with the same layout you saw in the preview — sliders, sample pages, menus, and all. It's vastly faster than building from scratch and gives you a solid starting point to customize.
2. Customize via the Site Editor or Customizer
For block themes, go to Appearance → Editor to access the Full Site Editor. For classic themes, head to Appearance → Customizer. Set your colors, fonts, logo, header layout, and footer content.
3. Reinstall Your Tracking Codes
Google Analytics, Meta Pixel, or any other tracking scripts you had in your previous theme's header/footer need to be re-added. Use a plugin like Insert Headers and Footers to do this cleanly without editing PHP files.
4. Test Core Functionality
After activation, test your site thoroughly: check navigation menus, contact forms, WooCommerce cart and checkout (if applicable), blog archive pages, and mobile responsiveness. Issues found now are infinitely easier to fix than after you've gone live.
5. Enable Automatic Theme Updates
In WordPress, go to Appearance → Themes and click on your active theme. You'll see an option to enable automatic updates. For security reasons, keeping your theme up-to-date is non-negotiable.
Never install themes from random ZIP files shared on forums or torrent sites. These often contain malicious code (nulled themes). Only download themes from trusted sources: WordPress.org, ThemeForest, or the developer's official site.
Frequently Asked Questions About Installing WordPress Themes
Why can't I install a WordPress theme? It shows an error.
The most common reasons are: (1) the ZIP file exceeds your server's upload size limit — use FTP instead; (2) you're uploading the wrong file — some theme packages contain multiple ZIPs, and you need the one labeled "installable WordPress theme"; (3) file permission issues on the server — contact your host; (4) the theme folder name has special characters causing a conflict.
Can I install a WordPress theme without the admin password?
Yes, via FTP or WP-CLI. If you have SSH or FTP credentials, you can upload theme files directly to wp-content/themes/ without ever logging into the dashboard. You still need admin access to activate it, though — unless you activate via WP-CLI.
How many themes should I have installed at once?
Keep it minimal. WordPress recommends keeping one or two inactive themes (as fallbacks) plus your active theme. Extra inactive themes don't affect your site's front-end performance, but they do create unnecessary maintenance overhead and potential security vulnerabilities if left unupdated.
Will installing a new theme delete my content?
No. WordPress stores your posts, pages, and media in the database — completely separate from theme files. Switching themes changes how your content is displayed, not the content itself. However, theme-specific customizations (custom widgets, theme options) will be lost and need to be reconfigured.
What is a child theme and do I need one?
A child theme inherits all the styling and functionality of a "parent" theme but lets you make customizations in a separate set of files. This is critical because if you edit the parent theme's files directly and then update the theme, your changes get overwritten. Child themes protect your customizations. If you plan to make any code-level changes to your theme, always use a child theme. Learn more about creating child themes at Codethesiss.
Is it safe to install free WordPress themes?
Yes — if you download from the official WordPress.org directory. All themes there go through a code review process. Free themes from random websites or file-sharing sites are a completely different story and pose serious security risks. Stick to trusted sources.
Ready to Transform Your Site? Install Your WordPress Theme Today
Installing a WordPress theme doesn't have to be stressful. Whether you're a first-timer clicking through the dashboard or an agency developer running WP-CLI commands across a fleet of client sites, there's a method that fits your workflow perfectly.
To recap: use the Dashboard method for free themes, the ZIP upload for premium themes, FTP when you hit size limits, and WP-CLI when you want speed and automation. Always back up before switching, always test on staging first, and always source your themes from reputable providers.
The right theme, installed correctly and customized thoughtfully, is the foundation of a high-performing WordPress site. Get that foundation right, and everything else becomes easier.
Explore More WordPress Guides at Codethesiss →